Doctor Badge Maker for MS Word
Microsoft Word provides a variety of features to people in their professional life. No matter your profession, you can always get a badge by creating it with the help of the free doctor ID card maker, a built-in feature of MS Word. Whether you need a simple card or one that is colorful and interactive, this tool will always help you create the card for your profession.
What is a doctor badge maker for MS Word?
It is a tool that most people use to create an ID card without the extra stress of thinking about the format, design, and other things. To create an identity badge, people used to get the services of professionals because they did not know how to use complex graphic design software. Some also bought templates and then modified them, which was an easy solution, but they were unsure if someone else had also used the same template.


How can the MS Word tool create an ID card for a medical professional?
If you want to try out making an identity card with the help of the card maker of MS Word, follow the tips given below:
Open a blank document:
When you open MS Word, you must open a blank document, generally an entirely new document with plenty of white space to work on.
Choose the card size:
After opening a blank page, you must choose the document’s orientation, as the selected orientation will also be reflected in the card. Then, you must choose the document’s dimensions, usually based on the card’s dimensions.
Know the standard card size. A card bigger or smaller than the standard size will always look awkward, so choose the size carefully.
Choose the shape:
After choosing the size, you will also have to select the preferred shape of the card. Usually, it is a rectangle with rounded or non-rounded edges.
Add the text:
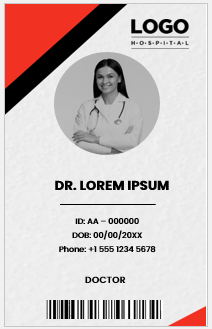
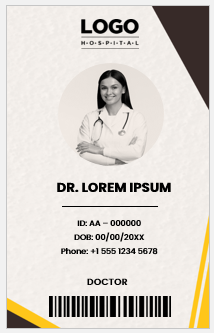
Now is the right time to add text to the card. This will start with adding the name of the hospital where the doctor works. It will also include the doctor’s name and department, specialty area, date of birth, address, etc.
A unique identification number that every hospital issues to its staff members should also be specified on the card.
Add images:
Some images added to the ID card are the hospital logo, a recent photograph of the doctor, etc. Make sure that you properly crop the picture to fit the dimensions of the badge and make it look natural.
Depending on the card size, you might have to edit the image. Professionally crop the image and then paste it into the space that you have allocated to it.
Signatures of the doctor:
The doctor’s card should also include signatures that authenticate the doctor and his employment in a hospital. Since you are designing the card independently and an official source is not issuing it, adding signatures for authentication is extremely important.
Tips for designing the ID card using a card maker:
Use lines for proper alignment:
If you want the text to be properly placed and aligned on the identity card, you can use lines in the card. These lines often enhance the look of the card. However, if you want these lines not to be visible, you can change their color to the background color, and they will become invisible.
Don’t add too many details:
Since the badge is a small credit card-size item, it cannot accommodate many details on its surface. If you try to add them, they will make your card look cluttered, and the basic and most important details will no longer be readable. So, make sure to add what is necessary.
Sample Templates
100+ editable ID badges
← Previous Article
Interpreter and Translator ID BadgesNext Article →
Black and White ID Badge Templates


Leave a Reply